

WHAT IS IT?
The Participation Requirements page is where parents and guardians will complete all participant information. This information will be available for Childcare Directors so your child will be eligible for participation in after school activities
I WOULD LIKE TO...
LOGGING IN AND ACCESSING PARTICIPATION REQUIREMENTS
1. Sign into the Participation Requirements here
2. Enter in your login information
3. To complete your required documents for childcare, click on the Visit Participation Requirements button
3

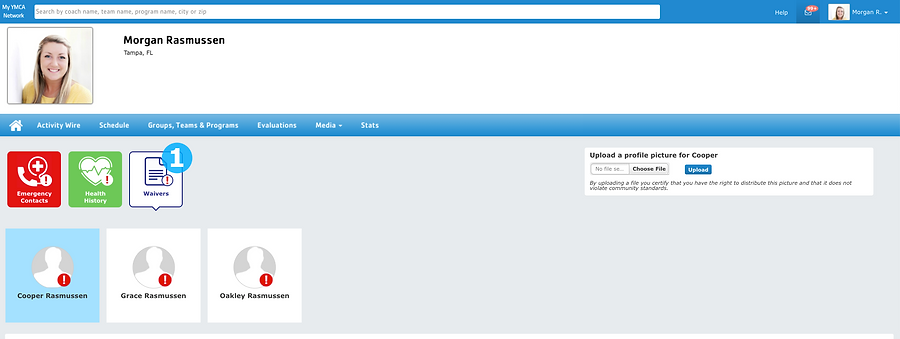
4. This page shows your dashboard where you can enter emergency contacts, health history, and fill out waivers
4

5. Another way to access Participation Requirements is by hovering over your name in the top right corner of the page, and selecting Participation Requirements in the drop down
5

Did this help? If not, click "No" to contact support.
Thank you for your feedback!
ENTER YOUR EMERGENCY CONTACTS & AUTHORIZED PICKUPS
1. To fill out your emergency contact information, click the Emergency Contacts tile
2. To add a new emergency contact, click the Add New Contact box
NOTE: The parent who registered the child will automatically be listed as an Emergency Contact.
1
2

3. Fill out the name, phone number, address, and email fields for your emergency contact
3
4. Click the Add Emergency Contact button
4

5. Switch the toggle to Yes next to the child(ren) that you would like this person to be an emergency contact for
5
6. Select the relation of the emergency contact to the child
6
7. Select whether the contact is authorized to pickup your child
7
8. Click the Update Emergency Contacts button
8

9. When you are finished adding Emergency Contacts, click Click here inside the yellow box to fill out the authorization for your emergency contacts in the waivers section
9

Did this help? If not, click "No" to contact support.
Thank you for your feedback!
FILL OUT PARTICIPANT HEALTH HISTORY
1. To complete your child's health history information, click on the Health History tile
1

2. Before filling out the health history information, you must enter a 6 digit Health History Security Code in the box
3. Click the Set Code button
2
3

4. On the medical history page, complete all required fields marked with an asterisk and click the Submit Health History button when you are finished
4

5. After you have submitted your Health History information, click here inside the yellow box to move on to the Waivers section of Participation Requirements
5

Did this help? If not, click "No" to contact support.
Thank you for your feedback!
1
COMPLETE REQUIRED FORMS & WAIVERS
1. To view the required waivers for your camp, click the Waivers tile
Note: If you have multiple children, you can switch between them by clicking the boxes with their names
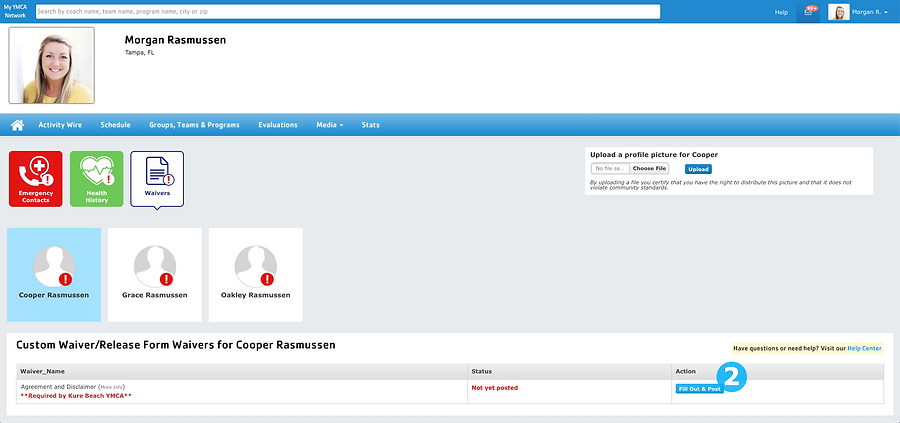
2. To fill out a waiver, click the Fill Out & Post button
2
3. Before filling out your first waiver you will be prompted to create a digital signature. Complete your signature in the box
4. Click the Save Signature button
3
4

5. Fill out all required information and click the Apply Your Signature button where prompted
5

6
6. Click the Save and Submit Form button to submit your waiver to the Childcare Directors to approve

7. To complete a waiver listed as a required uploaded document, click the Upload button
7

8. In the pop-up, select the file from your computer and click the Submit Changes button
8

Did this help? If not, click "No" to contact support.
Thank you for your feedback!
UPLOAD PROFILE PICS
1. To upload profile pictures for your children, click on the Profile Pics tile
2. Click on a child's tile that you would like to upload a photo for
1
2

3. Drag your photo into the box, or click within the box to select a file
3

4. Select the photo from your computer (if you used the click to upload file option in the previous step)
5. Click the Open button
4
5

6. Use the tools to zoom in, zoom out, or rotate your photo if needed
7. Click the Save button
6
7

Did this help? If not, click "No" to contact support.
Thank you for your feedback!
Participation Requirements